Website Management
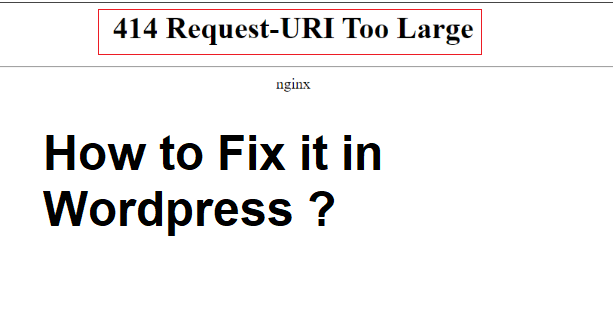
How to fix 414 Request URI Too Large Error in WordPress
Jun
Last Updated on June 22, 2024 by Jérôme Kerviel
Having trouble with a “414 Request URI Too Large” error? This message indicates your website’s URL is exceeding the server’s processing limit, preventing users from reaching your site.
The good news is this error is often fixable by modifying your server’s configuration. If you’re comfortable editing server files, we’ll guide you through the process for both Apache and Nginx setups.
First, we’ll explore the common causes of this error. Then, we’ll discuss some things to keep in mind before the fix. Finally, we’ll provide step-by-step instructions for two solutions!
Let’s dive in and get your website back on track!
Understanding the “414 Request URI Too Large” Error
This error code falls under the category of 4xx errors, indicating an issue on the server-side related to the request itself. In this specific case, the error message tells us exactly what’s wrong: the request URI is exceeding the server’s limit.
What is a URI?
A URI (Uniform Resource Identifier) is a unique string that identifies a resource, like a webpage, image, or file. You might be more familiar with the term URL (Uniform Resource Locator), which is a type of URI specifically used to locate resources on the internet.
What Makes a URI “Too Large”?
There are several reasons why a URI might become too large:
- UTM Codes: These tracking codes added to URLs can significantly increase their length.
- Complex Plugins: Plugins with advanced features can generate lengthy URIs.
- Redirect Loops: When a webpage gets stuck in an endless loop of redirection, the URI keeps growing with each redirect.
The Good News:
Luckily, the solution to this error is the same regardless of the cause, although the specific steps may vary depending on your server software (Apache or Nginx).
Important Steps Before Fixing the 414 Request URI Too Large Error
While fixing the “414 Request URI Too Large” error might seem simple, there are a few crucial steps to take first:
- Caution for Beginners: Modifying website files remotely can be risky. A small mistake can break your site. If you’re not comfortable with this process, consider seeking help from your hosting provider.
- Gather Necessary Tools: You’ll need to use developer tools like your browser’s inspector and File Transfer Protocol (FTP) software.
- Check Server Access Requirements: Fixing this error often requires access to your server’s files, not just your website’s files. Some hosting plans may not allow this. Contact your provider if you’re unsure.
Here’s how to prepare:
- Create a Full Backup: This is essential! Make a complete backup of your website’s data and content in case anything goes wrong during the fix.
- Identify Your Web Server: Use your browser’s developer tools (refer to your browser’s guide if needed) to find out what type of web server your site uses (e.g., Apache, Nginx).
- Locate FTP Credentials: If you decide to proceed, you’ll need to connect to your server using an FTP client. Find your FTP login credentials from your hosting provider’s control panel.
Remember, if you’re unsure about any of these steps or lack the necessary access, don’t hesitate to contact your hosting provider for assistance.
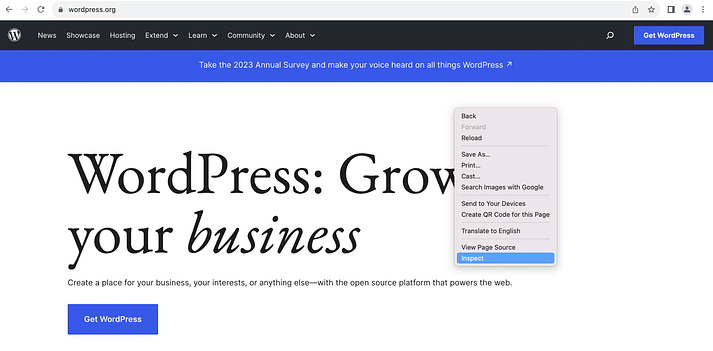
Right-click anywhere on the page to open your browser’s Inspect tool. We’ll use Google Chrome, but the process is similar in other browsers:
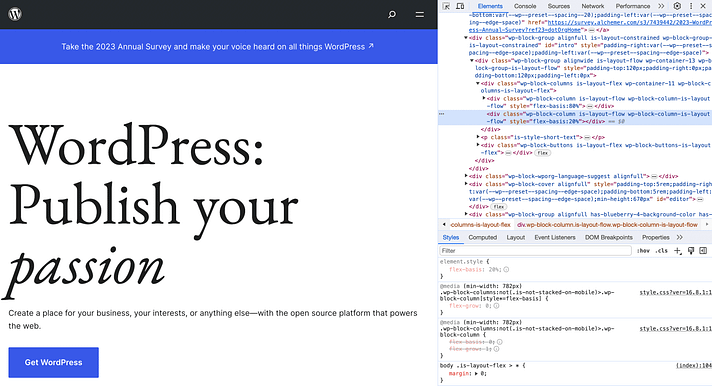
After you click on Inspect, you should see the page’s code in a right-hand window:
Go to the Network tab, and make sure the correct URL is selected in the Name column:
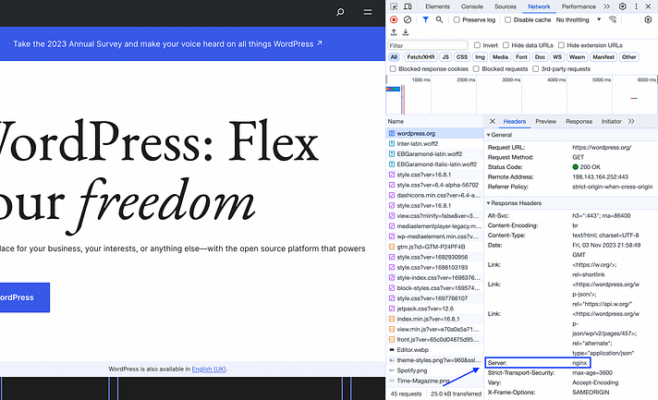
Under Response Headers, you’ll be able to see what type of server is being used. Note that the most common servers are Nginx and Apache, though some hosts use LiteSpeed Web Server.
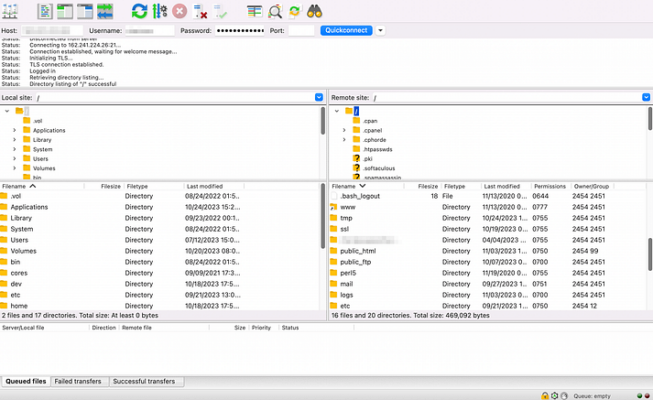
Now that you have this information, you’ll need to connect to your site directly using an FTP client, such as FileZilla. Install the tool and find your FTP login credentials.
How to fix the error on Apache and Nginx
Now we’ll show you how to fix the “414 Request URI Too Large” error on both Apache and Nginx servers:
How to fix the error in Nginx
Once you’ve accessed your website via FileZilla or a similar FTP client, you should see its files listed:
Next, you’ll need to locate your server’s root folder, which may require you to go up a few levels. Then, you can search for the etc folder. Within, you should find a nginix folder with a server configuration file labeled something like nginx.conf.hbs.
Download the file to your local device, and open it in your favorite text editor. Search for the following line of code:
large_client_header_buffers 4 8KIn this example, “8K” represents the allowed URI size. Change it to at least “128K.” If you want to go higher, make sure to use multiples of two.
If you can’t locate the above line of code, simply add it to the bottom of the file. Finally, save your new file and replace the old one using FileZilla. That’s it!
How to fix the error in Apache
Now, let’s go over how to fix the 414 Request URI Too Large error when your website is hosted on an Apache server. The process is almost identical to the above instructions, except we’ll be using a different line of code.
As with the last method, you’ll need to access your website using an FTP client. Once you’re connected, locate your server’s root folder and open the etc folder. There, you should be able to find an apache2 folder that will contain your apache2.conf file.
Save the file to your computer and open it in a text editor. Look for the following line of code:
LimitRequestLine 128000The number here represents a size limit, so change “128000” to “256000.” As before, you can choose a higher number, as long as it’s a multiple of two.
If you can’t find this line, simply add it to the bottom of the file. Then save your updated server configuration file, and replace the old one using your FTP client. Don’t forget to visit your site when you’re finished, to make sure the 414 Request URI Too Large error is gone!
Fix the “414 Request URI Too Large” error for good 🤩
Encountering this error can be a real problem. It can prevent you and your site’s visitors from accessing important web pages.
As we’ve seen, you can resolve this error with a few steps. First, create a backup of your site to ensure you can restore it if anything goes wrong. Then, connect to an FTP client to access your site’s files. Follow these steps based on your server type:
- For an Nginx server: Modify or add the
large_client_header_bufferscode in your server configuration file. - For an Apache server: Adjust the
LimitRequestLinecode in your server configuration file.
By following these steps tailored to your server type, you should be able to resolve the “414 Request URI Too Large” error and get your website back on track!